Getting started with Terraform on GCP
This article provides a step-by-step description of how to get terraform up and running against a GCP project. It follows Google’s tutorial and gets to the point whereby a VM can be provisioned in GCE using terraform scripts. The code for this article is in a github repo.
Installing Terraform
Terraform install docs cover this but, in brief, terraform runs as a single ~90Mb executable which can be downloaded in a zip file.
Once downloaded and extracted to somewhere on the path, terraform “just works”. It needs access to the internet (in order to talk to GCP!) so, behind a corporate firewall, proxy settings need to be provided. In a Windows command prompt this would look something like:
set HTTP_PROXY=user:password@your.proxy.name:8080
set HTTPS_PROXY=user:password@your.proxy.name:8080
Set up a new GCP Project
Create a new project and save the id
A new project can be created via the GCP console. Terraform needs the (immutable) project id which can be viewed when creating the project or later on the project home page.

Patience is a virtue
Initially I had some permission problems running terraform against a new project: 403 Forbidden errors. I think this is due to my eagerness to get started; I created a new service account as soon as I created a project. When trying again with a new project and waiting for everything to be spun up correctly it all worked fine.
Once the project is created I head to Compute Engine -> VM Instances and wait for the ‘getting ready’ spinner

… to be replaced with the ‘ready’ screen.

Create a new service account
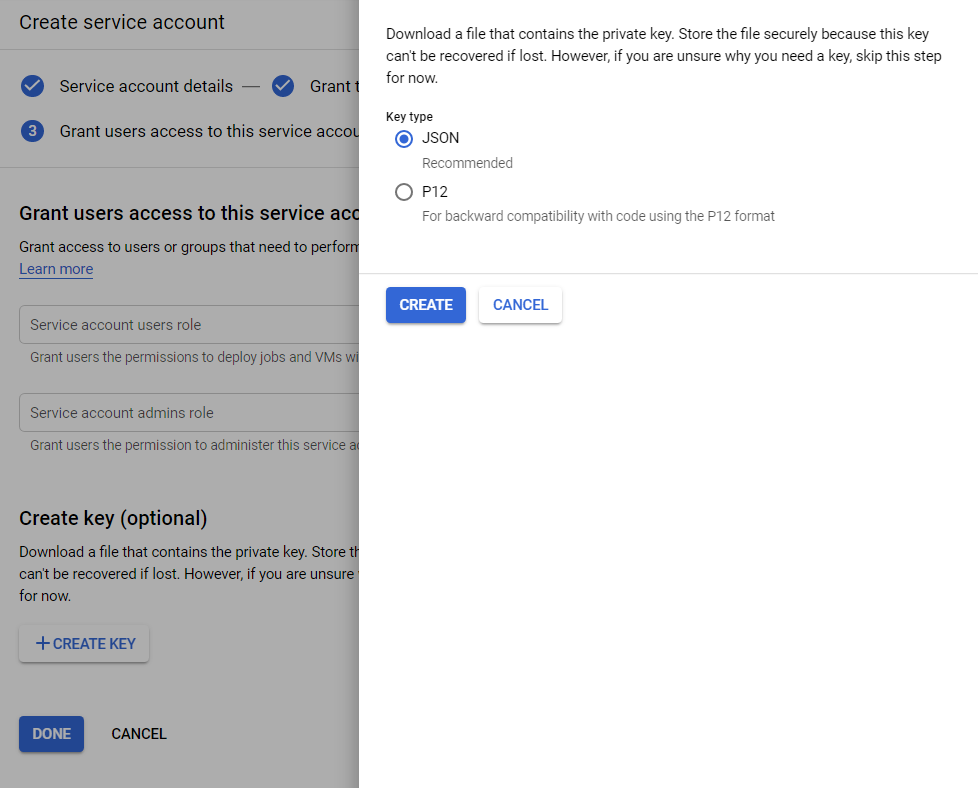
In the GCP console head to IAM -> Service accounts and create a new account for terraform to use. (You could use the default service account, but I find it better to give explicit credentials to terraform). I called my new service account tf-admin and gave it Project\Editor permission.
Terraform needs the service account credentials in order to authorise against GCP when provisioning resources so, when creating the account, download the private key as a json file.

Create a terraform project
I saved the credentials json file to a new directory as gcp-key.json and created a simple main.tf file:
// Configure the Google Cloud provider
provider "google" {
  version     = "1.20.0"
  credentials = "${file("gcp-key.json")}"
  project     = "project-id-12345"
  region      = "europe-west2"
}

// A single Google Cloud Engine instance
resource "google_compute_instance" "default" {
  name         = "my-first-terraform-vm"
  machine_type = "f1-micro"
  zone         = "europe-west2-b"

  boot_disk {
    initialize_params {
      image = "debian-cloud/debian-9"
    }
  }

  network_interface {
    network = "default"

    access_config {
      // Include this section to give the VM an external ip address
    }
  }
}
My terraform script is made of two simple blocks. That is all that is required to connect to GCP and provision a brand new VM!
The first block tells terraform that I will be using GCP to provision my infrastructure. It’s pretty self explanatory and well documented. Although the google tutorial doesn’t use it I think it is a good idea to pin the provider version to ensure there are no side-effects accidentally introduced by new releases.
The second block provisions a new VM using basic settings. The terraform docs details the possible settings.
It is easy to see how this simple example can be extended simply by adding in more blocks.
Running the terraform script
With everything set up properly as described above it should all “just work”.
Format
terraform fmt provides some basic linting against my scripts to ensure the syntax is correct and adjusts the formatting to match recommended terraform standards.
Initialise
Running terraform init against my directory sets it up to be used by terraform and downloads whatever google-specific stuff is needed.
Plan
Before executing a script we would always want to plan it to make sure that terraform is going to perform the actions we expect. It also validates credentials, script, etc.
With everything in place as described above terraform should say that my new VM needs to be created:
C:\dev\terraform-test>terraform plan
Refreshing Terraform state in-memory prior to plan...

------------------------------------------------------------------------

An execution plan has been generated and is shown below.
Resource actions are indicated with the following symbols:
  + create

Terraform will perform the following actions:

  + google_compute_instance.default
      id:                                                  <computed>
      boot_disk.#:                                         "1"
      boot_disk.0.auto_delete:                             "true"
      boot_disk.0.initialize_params.0.image:               "debian-cloud/debian-9"
      machine_type:                                        "f1-micro"
      name:                                                "my-first-terraform-vm"
      network_interface.#:                                 "1"
      network_interface.0.network:                         "default"
      project:                                             <computed>
      zone:                                                "europe-west2-b"

Plan: 1 to add, 0 to change, 0 to destroy.
Apply
terraform apply will execute the changes and create the VM. Once completed I can see my new VM in the GCP console!

Tidying up
Terraform is idempotent so running terraform apply again shows that no more changes need to be made. Once I have finished I can use terraform to remove all the resources by running terraform destroy.
Simple, and great!
cloud (15)